You would want your smartphone to be really smart and offer you unprecedented faster performance. This is perhaps possible with more RAM on your device. Of course, today’s Android devices come with a high-end memory module and offer you excellent RAM management.
However, do you know that you can increase the RAM on your Android phone? Most of us believe that RAM is a physical component and cannot be changed. However, in the case of an Android phone, you can easily increase the RAM using a memory card. Let us check the different methods used for how to increase RAM of Android phones using memory cards?
Why increase RAM using Memory Card?
If your phone is equipped with low RAM, such as 1 GB or 2 GB, it may begin struggling to cope up with the high-end applications and usage patterns that we have been used to as of today. In such cases, your phone will begin struggling to perform even the simplest of the tasks.
If your RAM is insufficient, you may find your phone unable to open and run applications or even hang incessantly. Now that not everyone can afford a high-end phone with a high RAM capability. If you are someone who has a low-end device with a low RAM, you can use your memory card to increase the RAM capability.
How to increase RAM of Android phone using memory Card?
There are a couple of methods that should work wonderfully in helping you in finding how to increase RAM of Android phone using memory card with ease. While you can do it yourself without the need for an app, or you can use an app specifically designed for the purpose.
Method 1:
This has been one of the easiest and best methods to used if you want to know how to increase RAM of Android phone using memory card . You will use the memory card to create a virtual memory for your phone.
For increasing RAM using this method, you would need to use a PC, an SD card, a card reader, and a phone that has been rooted. The method will not work on an unrooted device. Before you can proceed to root your device, do note that it is a risky affair if you are not an expert and may even brick your phone beyond repair.
Step 1:
Connect the SD card to your computer and use a partition tool to sectionalise your memory card. You can use any partition tool and format the SD card. Make sure that the memory card has been backed up if you have any important content that you don’t want to lose.
We will use the MiniTool partition tool for the purpose.
Step 2:
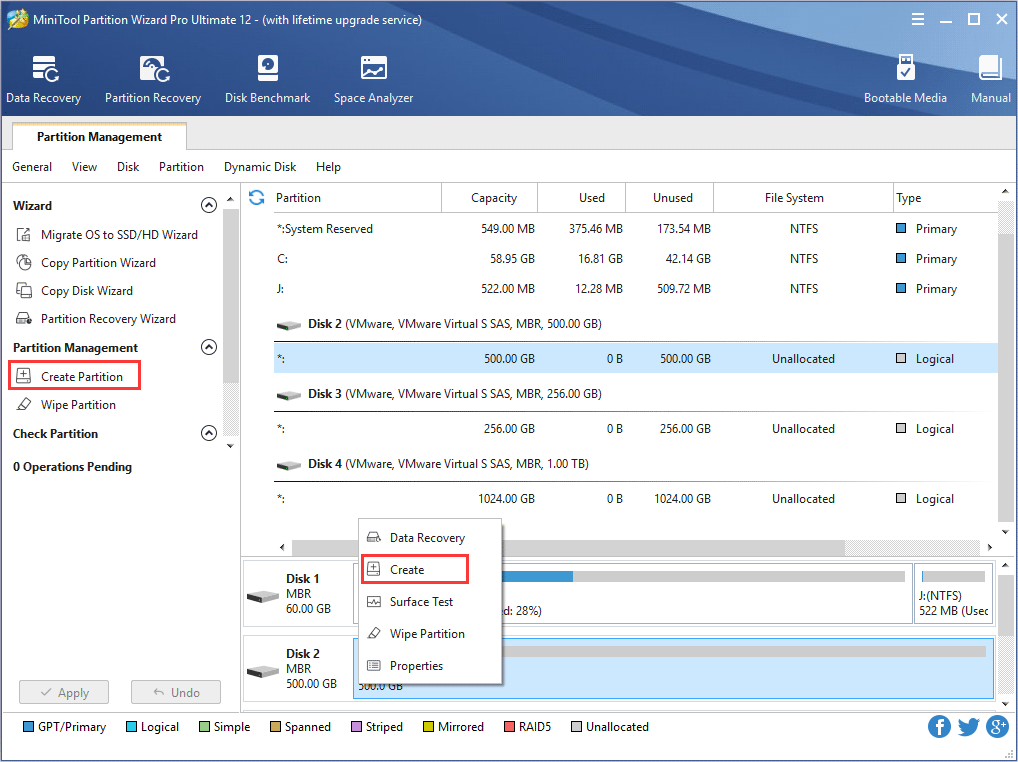
Once your card is detected in the Mini Partition tool, select it and begin creating partitions. Right-click on the memory card and click on Create partition.
Step 3:
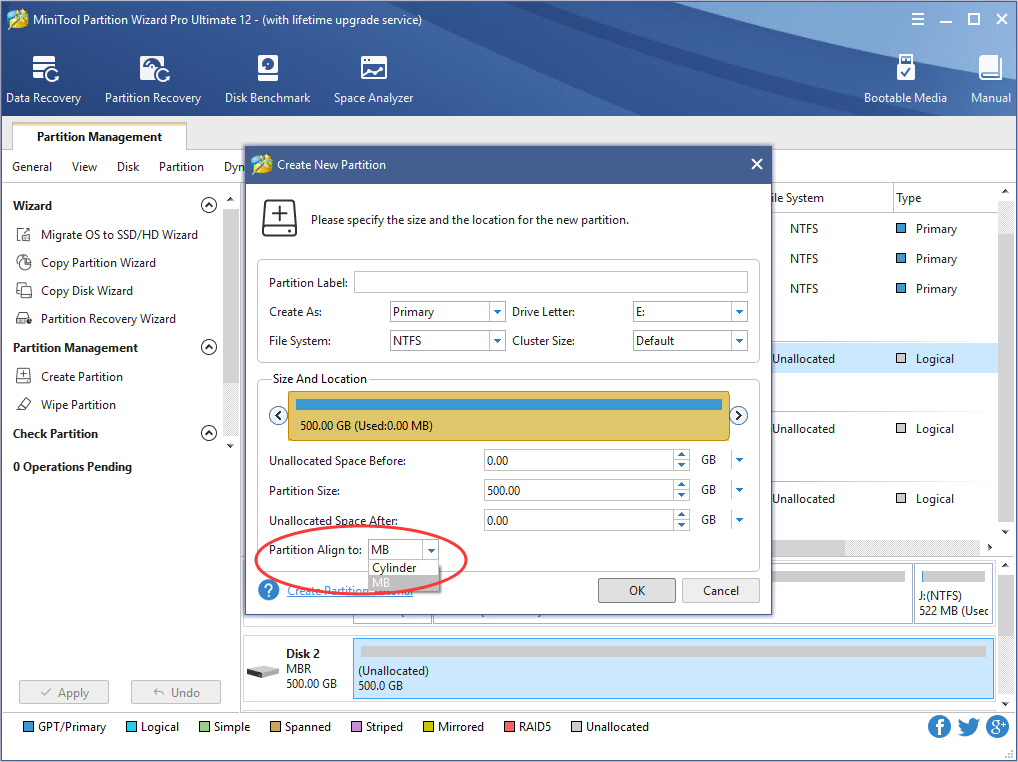
In the next screen on the interface, you would find the options to configure Partition Label, Partition Type, Drive Letter, File System, Cluster Size, Partition Volume, Partition Location, and Partition Alignment Method.
Select the partition option as Primary. The file system should be chosen as FAT if the card is below 4 GB and FAT32 if the card is above 4 Gb in size.
Step 4:
In the next stage, allocate the size of the memory that you want to allocate to RAM. Of course, you do not wish to use the entire memory card for RAM to increase. Follow the on-screen instructions and click OK. Change the file system for this partition as .ext.
Remove your memory card from the computer.
Step 5:
Now that the memory card has been partitioned, the next step would be to link it with your Android device. For this, we recommend downloading an app called Link2SD.
Install and launch the app and give it root permission when asked. It will now ask you to provide the file for associating with your Android device. Select the file you saved with the ext file system in the previous step.

Follow the onscreen instructions and link the apps to your created partition.
Step 6:
If you want to increase the RAM on your Android phone, you will need to download another Root Swapper app.
Launch the app and choose the RAM you want to increase. The app creates a .swp file, and thus your Android device RAM is increased.
Method 2
This method will use an app specifically designed to make use of your SD card to increase the RAM on your Android phone. It can be a great option if you are not tech-savvy and looking for info on how to increase RAM of Android phone using memory cards without following the complicated steps as in the above method.
The method uses the SD card for increasing RAM by creating a .swp file. That would mean you need to be careful in opting for the right memory card faster. Roehsoft RAM Expander has been one of the most popular options in this context.
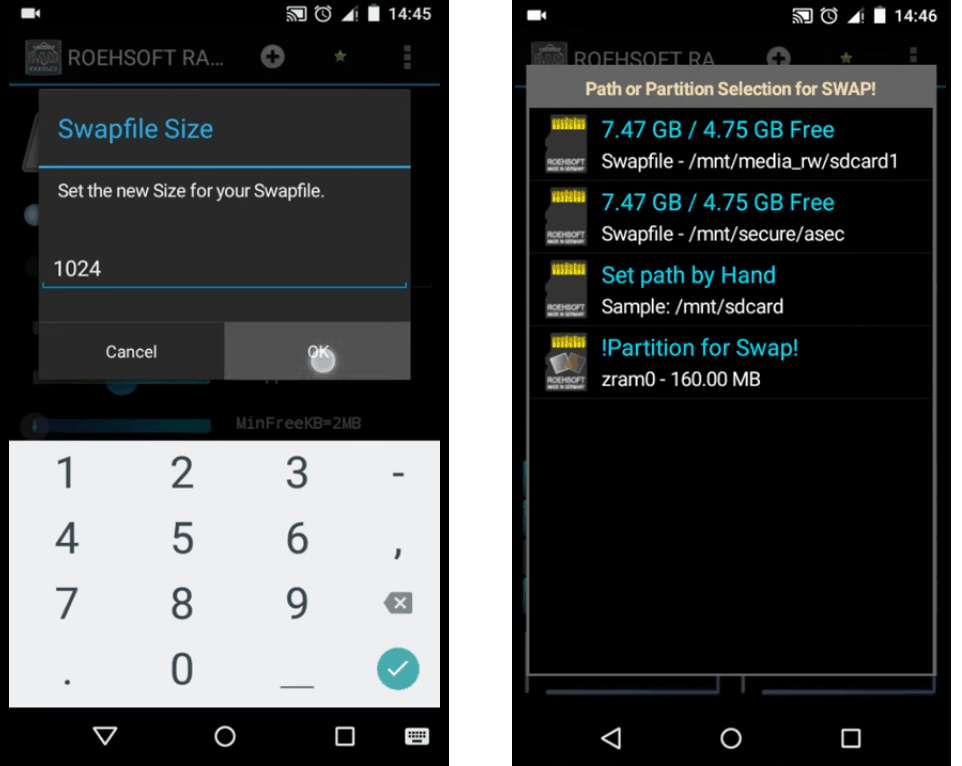
You just need to download and install the app and provide it the root permissions. Please note that you need a rooted Android device for the method to work. When launched, the app will let you know the RAM available and the RAM that can be swapped from the memory card.
The app should ask you to choose the swap file size and the path to be selected. Pick the right size you want to swap and swap partition. For the swap partition, we will choose a memory card here.
That should do it. Your swap file will be created. Your Android device will now use this memory along with the built-in RAM to run applications.
That does it, and you have increased the RAM on your Android device using a memory card.
The Closing Thoughts
Well, those were the top methods that can work best if you are wondering how to increase RAM of Android phone using memory card. While the first method is considered to be the best, it may be a little heavy and complicated for the people who aren’t tech-savvy. The second method can be best suited for such users.
Please note that both the methods need your Android device to be rooted and will not work on an unrooted phone.