Hello Beingtrickians, Today I will show you how to Root Redmi Note 3 (Snapdragon)
To Root Redmi Note 3 (Snapdragon) 650 first, you have to unlock the bootloader.If you have already unlocked the bootloader you can proceed to Root Redmi Note 3 (Snapdragon).This is a hassle-free Rooting process with the help of my batch file specifically for Redmi Note 3 (Snapdragon) using SuperSU and TWRP recovery to flash many of your favorite custom ROM and apps.Remember, this method is to unlock the snapdragon version of Redmi Note 3, but not MTK.
If you want to unlock Redmi Note 3 bootloader read this.Without unlocking the bootloader you can’t root your phone.Or you can directly unlock the bootloader by going here
Requirements
- Unlocked Bootloader
- Microsoft® Windows® 8/7/10 (32 or 64-bit)
- USB Data Cable
- Some files which are given in the steps below.
Maha Loot :– [Video Tutorial+Proof Added] Whaff App Loot :- Earn Unlimited Money from Whaff Rewards
Steps To Root Redmi Note 3 (Snapdragon) :-
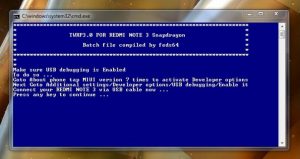
[toggle title=’Click to show/hide spoiler’]1)First of all, you have to enable OEM Unlock by going to Settings > Additional settings > Developer options > Enable OEM Unlock.

2)Enable USB Debugging by going to Settings > Additional settings > Developer options > USB Debugging – Enable (If you have not activated Developer options, then Goto Settings > About phone > tap MIUI version 7 times > You are now a developer).
3)Create a modded Boot.img for your Redmi Note 3.Read this post to do it.
4)Now download and install Universal ADB Driver on your computer.
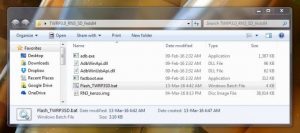
5)Download and unzip this TWRP3.0_RN3_SD_feds64.zip file in your computer.
Deals & Coupons :- [LATEST] Freecharge Promo Code, Deals & Cashback Offers – January 2017
6)Download SuperSu and move it to the root directory of your phones internal storage.[/toggle]
Installing SuperSU:
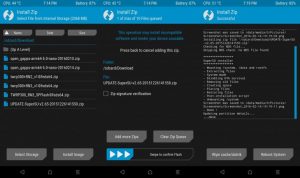
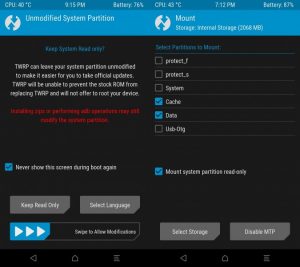
Adjust the time to your time zone, change your language and you can even make a backup(optional)

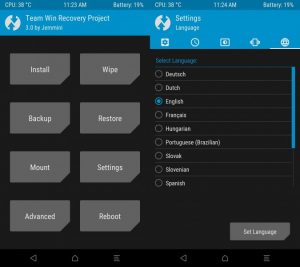
Then go to main menu.Click on “Reboot” and Select “System”.

Run SuperSU, Install an addon backup script that will let SuperSU survive custom ROM updates and nightlies.

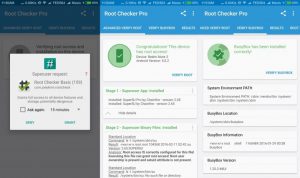
Now you have SuperSU installed, and you can download Root Checker to check root permissions in your Redmi Note 3.
Maha Loot :- [*VIDEO TUTORIAL+PROOF*] CCD App Loot :- Get Rs.150 on Sign Up + Refer & Earn Unlimited