If you are using Google Chrome as the main browser and getting an error message showing “server DNS could not be found” when you try to visit web pages then there is nothing to worry. In this article, we are going to solve all your queries.
To browse on the internet we use browsers such as Google Chrome, Mozilla, Opera Mini, Internet Explorer. All these browsers are extremely safe and easy to use. Moreover, you can use these browsers on Android, macOS, Linux, and iOS. But there are times when we face a common problem while trying to access some websites where an error message comes up showing, “Server DNS Address Could Not Be Found”. This means there is some issue related to the Domain Name System, also known as DNS address and hence it can’t be found in our browser.
Now, a domain name is basically a human-readable address related to a website. Let us put it this way, “abc.com” is a domain name but it also has an IP address which has a set of number. The domain name you see is just the character representation of the IP address.
Now if you enter those numbers instead of the domain name and search you will be redirected to the same website. It is very difficult to remember numbers for so many websites, so domain names are being used.
The DNS server which matches the domain names is associated with their IP address. So when you enter a domain name, your system communicates with the DNS servers and further requests an IP address linked with the domain name. Your system finally connects to the IP address and gives permission to access the website. It’s a fast process if there are no problems but sometimes you may face issues in resolving the IP address of the particular website. But we are here to solve your problem with a detailed guide where we will describe various methods to solve the “Server DNS address could not be found” error message problem.
How to fix Server DNS Address could not be found error on Android?
Solution 1: Reset your mobile data/ Reset Router
Most of the time, if you reset your mobile data or reset router then the problem gets resolved. For this, you have to turn off the router and then switch it on. And if there is a problem with the mobile data you need to turn off the mobile data first and turn on again. You will notice that your problem has been solved instantly. But if the problem still exists then you may follow our next solution.
Solution 2: Entering DNS Address in Android
The second solution in our list is manually entering the DNS address. This also helps to fix the error on the Android phone. Following is the step by step guide:
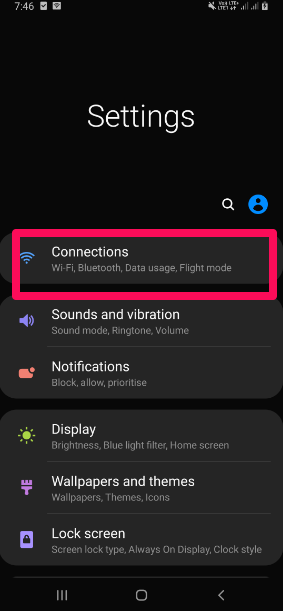
- Click on the settings of your phone and press the connections button.

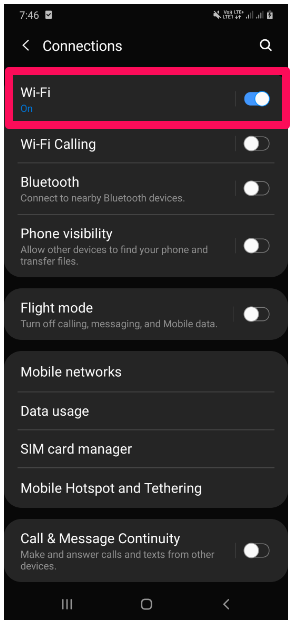
- Secondly, click on the Wi-Fi option.
- When the Wi-Fi turns on, just press and hold on the active network. You will get an option showing manage network settings. Click on that option.
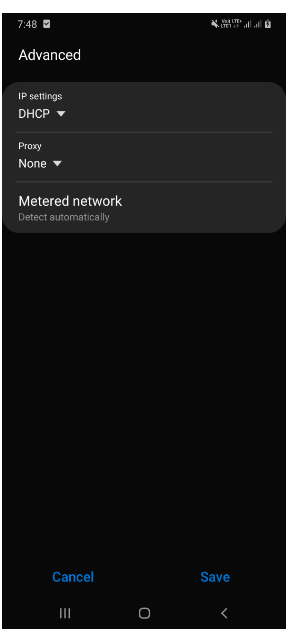
- You will see a full menu of Advanced Settings.
- Change DHCP to static under the IP settings.
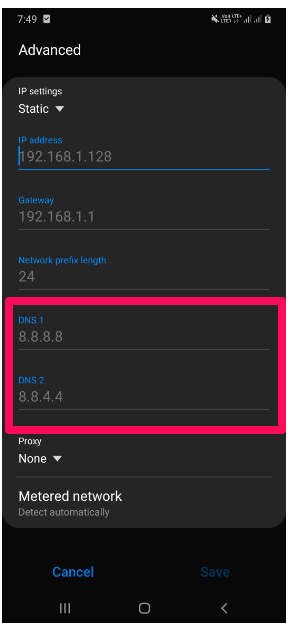
- Type 8.8.8.8 under DNS 1 as well as 8.8.4.4 under DNS 2. (These are Google’s free public DNS servers)
- Finally, save the newly updated setting and reconnect your Wi-Fi.
I hope this clarifies how to fix the error Server DNS Address Could Not Be Found on Android.
How to fix “Server DNS Address Could Not Be Found” Error in Computer?
If you are facing the same error in your computer then check out the following solutions. We have suggested various methods through which you can fix this issue.
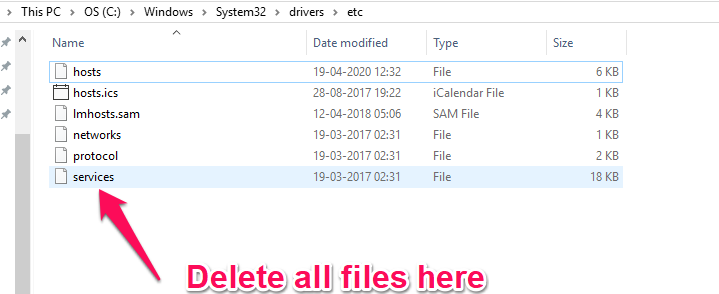
Solution 1: Delete some files from the ‘etc’ folder
This is a super easy solution through which you can resolve the error. All you need to do is just go to C:\Windows\System32\drivers\etc. Then just delete all the files present there. Finally, turn on the internet and access your Chrome browser.
Solution 2: Clear the host cache of your browser
If the host cache of your computer’s browser is full of corrupt, you may face the “server DNS address could not be found” error and cannot access various websites. In fact, most of the users face the same problem. But not to worry as you can fix this in no time.
Step 1: Firstly open the web browser of your computer. If you are using Chrome then search by typing chrome://net-internals/#dns in your search bar and now press Enter on the Keyboard. You will get clear host cache button in the page. Click on that option. You can follow the same step in every browser.
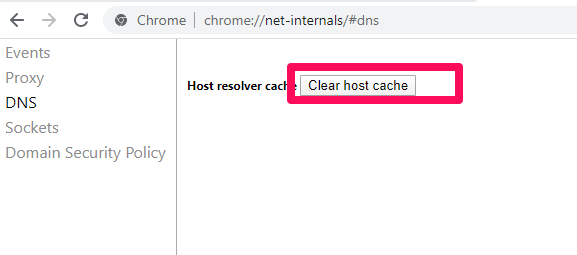
Step 2: Check if the problem has been solved.
Solution 3: Change the settings of your DNS Server
If the DNS Server settings of your system are configured incorrectly, then you may face the error and hence cannot access the websites. So check out the steps given below to fix this issue:
Step 1: Press the Windows button key as well as R on your computer’s keyboard at the same time.
Step 2: Now type control panel in the box and then click OK.
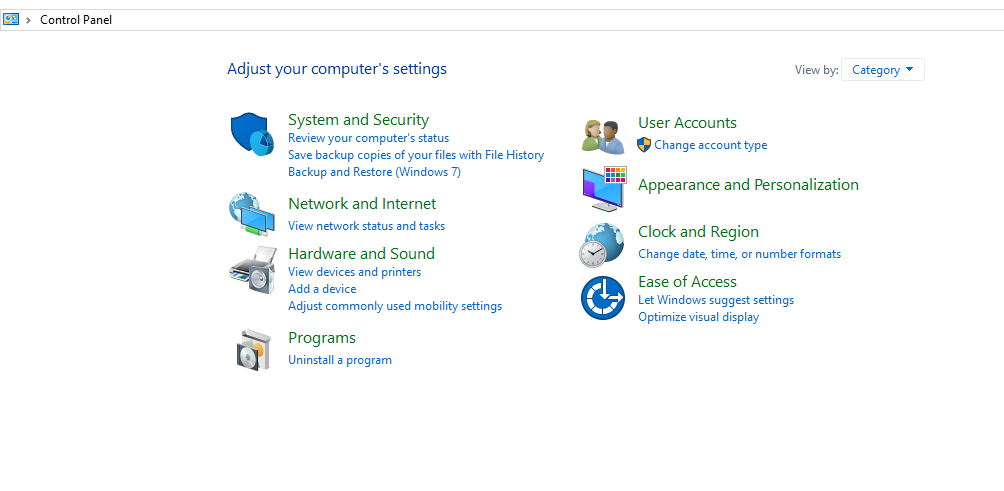
Step 3: You will see lots of icons from these you need to tap Network and Internet icon.

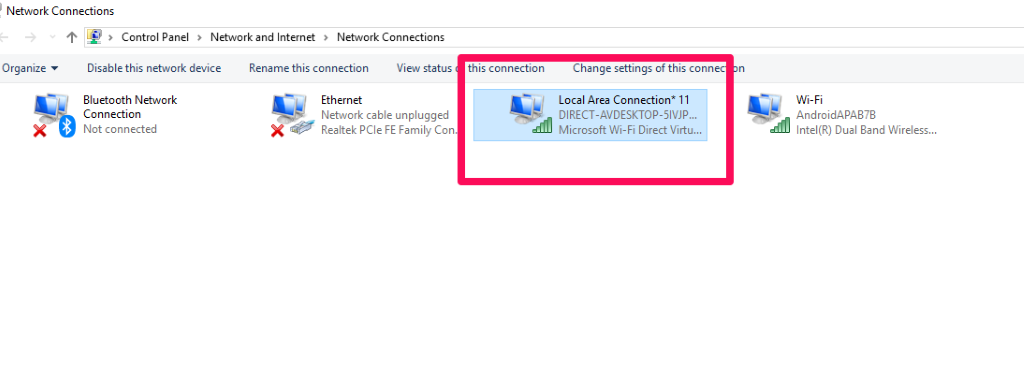
Step 4: Now click on the Change adapter settings.
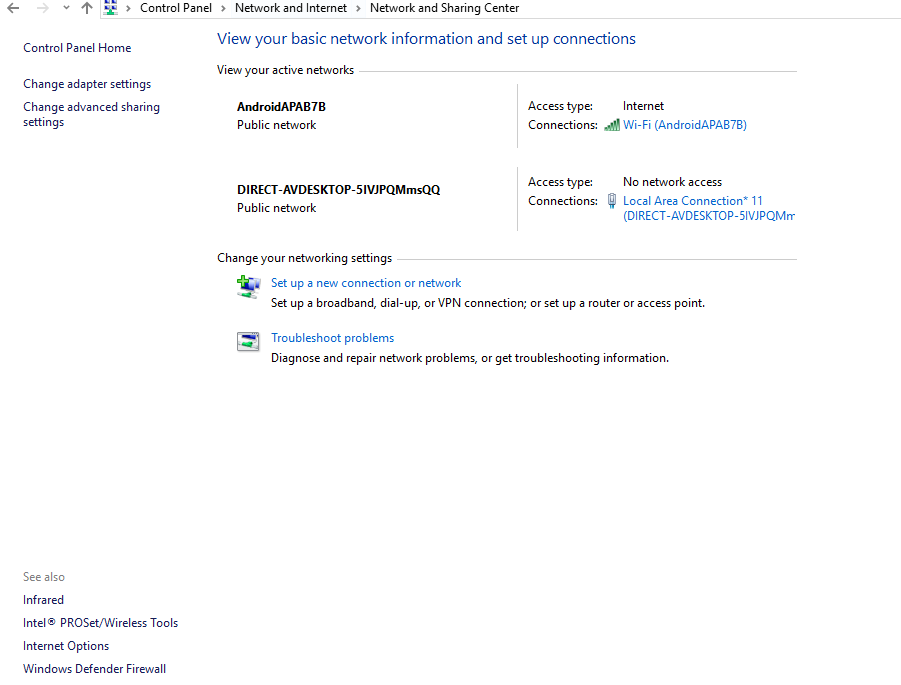
Step 5: Then you have to right-click on the connection icon (either Wireless Network Connection or Local Area Connection). Next click on the properties.
Step 6: Tap on the Internet Protocol Version 4 (TCP/IPv4) and click Properties.
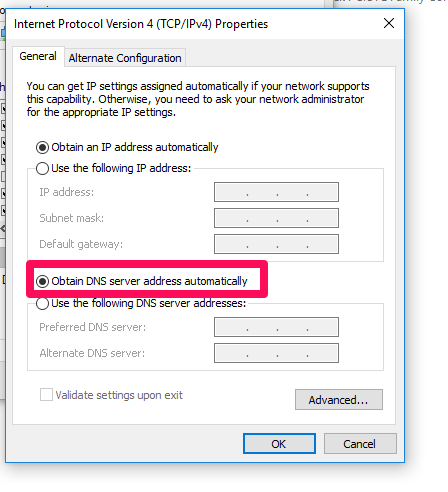
Step 7: You can follow one of the following steps in the General tab on whether ‘Obtain DNS Server address automatically’ is selected:
- If your computer has not automatically selected ‘Obtain DNS server address automatically’ then select and click OK.
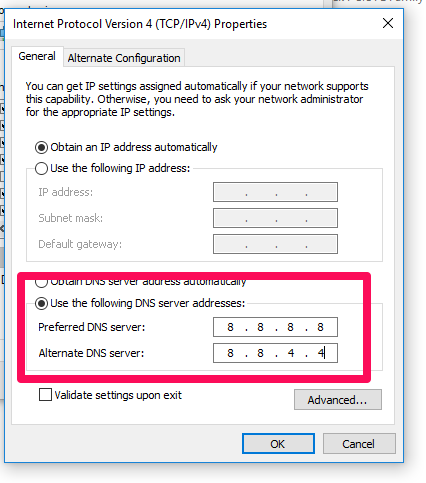
- Or if ‘Obtain DNS server address automatically’ is selected then click ‘Use the following DNS server address’. Next enter the server address given: Preferred DNS server: 8.8.8.8 and Alternate DNS server: 8.8.4.4
- Finally, check if your problem is resolved.
So these are some of the solutions which will help in fixing the error. Feel free to comment if you have any queries.


![[100% Working] How to Remove Last Name from Facebook On Mobile Device.](https://beingtricks.com/wp-content/uploads/2017/01/remove-last-name-from-facebook-490x298.png)